

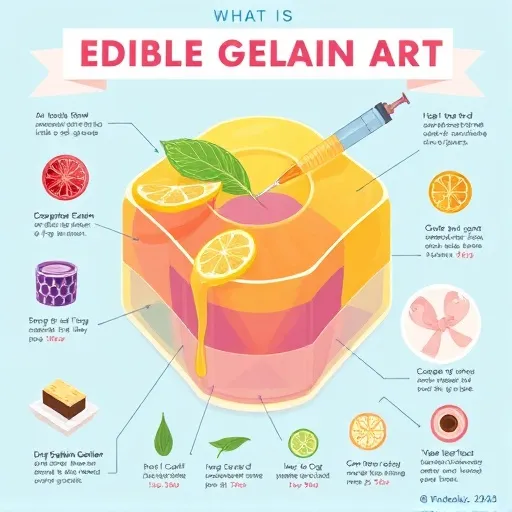
Edible gelatin art
What Is Edible Gelatin Art?
Edible gelatin art is the craft of building intricate, three-dimensional designs suspended inside a transparent gelatin medium. Picture sculpting, except your clay is a clear, jelly-like canvas and your chisel is a syringe. Artists inject colorful gelatin solutions beneath the surface using syringes and specialized tools, layering imagery that seems to float weightlessly inside the dessert. The result is part culinary technique, part visual magic — and it's exactly why edible gelatin art has become such a talked-about skill in 2026.
The range of what you can make with edible gelatin art is honestly wild. Simple floral patterns are the classic starting point, but experienced hands push into detailed portraits, miniature landscapes, and abstract compositions. Because the medium is food-safe and translucent, light travels through it in a way that makes the whole piece glow from within. No wonder edible gelatin art shows up as a showstopper at parties, weddings, and high-end dining establishments alike.
What makes edible gelatin art so appealing right now is its sheer versatility. You can scale it down to individual serving cups, scale it up into a large celebration centerpiece, or turn it into an interactive dessert experience where guests watch the design reveal itself slice by slice. It's culinary entertainment as much as it is a delicious treat — and that dual identity is a big part of why edible gelatin art keeps winning people over.
The Gelatin Science and Bloom Strength Behind Clear Edible Gelatin Art
Getting the science right is everything in edible gelatin art. Gelatin is a protein derived from collagen; dissolve it in hot water, cool it down, and it forms a gel network that traps water molecules. That structure is what gives the medium its signature jiggle and clarity — the two qualities every edible gelatin art piece lives or dies by.
Clarity matters enormously. The clearer your gelatin, the more vibrant and visible your internal designs become. That's why most artists reach for a high-quality, unflavored gelatin powder or sheet gelatin known for transparency. Some practitioners go a step further and clarify their gelatin with a purification process, ending up with a nearly crystal-clear canvas for their edible gelatin art.
Then there's bloom strength — basically a measure of gel firmness. Higher bloom values give you firmer gels that hold shape better, which is critical when you're injecting delicate designs. Most edible gelatin art projects call for a bloom strength between 200 and 250, though the sweet spot shifts depending on your technique and the ambient temperature of your kitchen.
Temperature control is the other make-or-break factor. Your gelatin base needs to be set but not too firm before you start injecting colors. Too warm, and your injected designs bleed and lose definition. Too cold, and the surface may crack or the injected gelatin won't adhere properly. Seasoned artists develop a feel for the right consistency, often comparing it to the texture of a soft-boiled egg white. Nail this, and your edible gelatin art will look clean and professional.
Essential Tools and Ingredients for Beginner Edible Gelatin Art Projects
Here's the good news: edible gelatin art doesn't demand a huge investment to get started. A rundown of the core tools and ingredients worth having on hand:
- Unflavored gelatin powder or sheets — hunt for a high-clarity product with consistent bloom strength. This is your primary medium.
- Syringes and needles — your paintbrushes. A variety of needle gauges lets you draw fine lines and broader strokes. Blunt-tip needles are safer and easier for beginners.
- Food coloring — gel-based or oil-based food colors beat liquid dyes because they don't dilute the gelatin mixture as much. Grab a range of primary colors to mix your own palette.
- Clear containers or molds — glass or food-grade silicone molds are ideal. Glass is great for practice since you can inspect the design from every angle.
- A steady hand and patience — genuinely half the battle. Edible gelatin art rewards those who slow down.
- A clean workspace — contamination clouds your gelatin and kills clarity. Sanitize everything.
- A thermometer — a digital one helps you monitor the temperature of your gelatin base and colored mixtures.
- Small mixing bowls and a whisk — for prepping your colored gelatin solutions.
As you level up, you might invest in multi-port injectors, curved needles, and professional gelatin clarifiers. But for most beginners, the basics above are more than enough to start creating beautiful edible gelatin art.
Step-by-Step Injection Technique for Your First Flower Design in Edible Gelatin Art
Ready to try edible gelatin art yourself? Here's a beginner-friendly project — a basic flower design inside a clear gelatin cube. It teaches the fundamentals of injection technique and layering without overwhelming you.
Step 1: Prepare your clear gelatin base. Follow the manufacturer's instructions — dissolve gelatin powder in hot water, stir until fully dissolved, then add cold water to hit the right concentration. For edible gelatin art, aim for a slightly firmer set than standard dessert gelatin, so don't fear using a bit more gelatin than the package suggests. Pour a portion into your container, keep the rest warm in a water bath, and refrigerate until set but still slightly tacky — usually 30 to 45 minutes.
Step 2: Prepare your colored gelatin. Take small amounts of warm clear gelatin, add gel food coloring, and stir well. Go fairly concentrated for vibrant designs. Keep these mixtures warm — if they cool and set, they'll clog your syringe.
Step 3: Load your syringe. Draw up the colored gelatin, avoiding air bubbles — tap the syringe gently to release trapped air, then attach your needle.
Step 4: Inject your design. Insert the needle at a shallow angle and slowly depress the plunger while drawing the needle along your intended path. The colored gelatin displaces the clear gelatin, creating a visible line or shape. For a simple flower, inject a small circle for the center, then add petal shapes radiating outward. Work slowly — rushing causes tearing or bleeding. Mistakes are forgiving in edible gelatin art; you can often work around them.
Step 5: Add layers. Add more clear gelatin on top, let it set, then inject another layer of colored design. This is how artists create the illusion of depth and three-dimensionality. For a first project, one or two layers is plenty.
Step 6: Chill and serve. Refrigerate until fully set — another hour or two — then unmold onto a plate or serve right in the container. The translucent beauty of your edible gelatin art will be on full display.
Advanced 3D Sculpting, Gradient Effects, and Embedded Elements in Edible Gelatin Art
Once the basics click, a whole world of advanced techniques opens up in edible gelatin art. 3D sculpting and layering let you build shapes at different depths instead of flat designs — some artists construct entire underwater scenes with coral, fish, and seaweed suspended in clear gelatin. Gradient and ombre effects come from injecting small amounts of color in gradually shifting hues, which works beautifully for floral designs and abstract patterns. Embedded elements — fruit pieces, edible flowers, even small candies — add texture and visual interest before the gelatin fully sets. And multi-color injections using multi-chamber syringes create swirling, blended designs that are popular for abstract pieces and complex floral arrangements. Temperature-controlled layering rounds it out, giving advanced artists sharp boundaries between colors — or zero bleeding at all.
2026 Trends: Nature-Inspired Designs, Custom Designs, and Interactive Dessert Experiences
Edible gelatin art keeps evolving, and 2026 has brought some genuinely exciting shifts. Nature-inspired designs — florals, ocean scenes, forest motifs — remain huge, with artists pushing realism toward miniature terrariums and underwater ecosystems. Personalized and custom designs are surging too: monograms, favorite flowers, meaningful symbols — bespoke edible gelatin art is now a sought-after feature at weddings, birthdays, and corporate events. Interactive dessert experiences are another big one, with restaurants letting guests watch a design reveal slice by slice or build their own mini pieces. Add in a push for sustainable, natural ingredients — natural food colorings, organic gelatin sources, eco-friendly packaging — plus social media-friendly creations built for bold colors and surprising reveals, and you've got a craft with serious momentum.
Common Mistakes to Avoid and Why Edible Gelatin Art Is Worth Learning in 2026
Even seasoned dessert makers stumble with edible gelatin art. The top pitfalls: working with gelatin that's too warm or too cold (the number one issue), overusing liquid food coloring (it dilutes the gelatin and weakens the set), ignoring air bubbles, overcrowding the design, skipping chilling steps, and neglecting hygiene — gelatin is protein-rich and supports bacterial growth if mishandled. Avoid these, and your edible gelatin art will consistently impress.
In a world where dessert trends come and go, edible gelatin art has staying power. It blends artistry, craftsmanship, and culinary science in a way few mediums match. Whether you want to expand your baking repertoire, wow clients with unique dessert offerings, or pick up a hobby that's as fun to make as it is to eat, edible gelatin art delivers. The skills you build — precision, patience, color theory, and a feel for temperature and texture — transfer to plenty of other culinary pursuits. With 2026's online tutorials, workshops, and high-quality ingredients and tools, there's never been a better moment to dive into edible gelatin art. Gather your ingredients, set up a clean workspace, start simple, and don't be afraid to experiment — the world of edible gelatin art is waiting for your injection.