

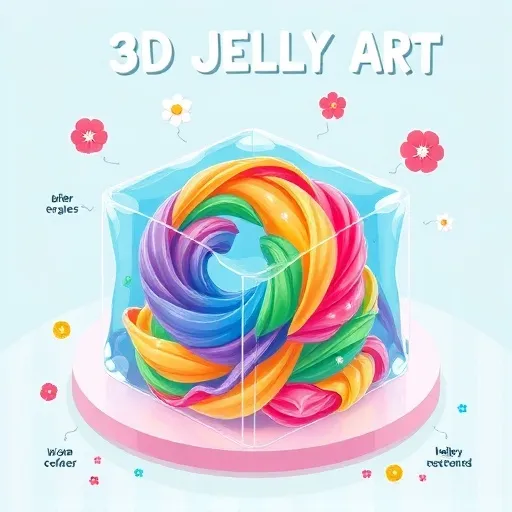
Mesmerizing 3D jelly
What Exactly Is 3D Jelly Art?
If you've ever scrolled past a video of someone injecting colorful swirls into a block of clear gelatin and thought, "Wait, how is that even real?" — welcome to the mesmerizing world of 3D jelly art. Sometimes called 3D jelly cake or jelly flower art, this technique involves injecting edible imagery into a clear gelatin base to create a jaw-dropping three-dimensional effect. Unlike a traditional cake where the decoration sits on top, 3D jelly art places the design inside the dessert, so it looks like it's floating in mid-air. Pretty wild, right? Learning how to make 3D jelly art is basically learning how to paint in reverse — you're building a dessert from the inside out.
The technique originated in Southeast Asia and has since exploded across global dessert communities. Here in 2026, it's a full-blown staple in creative baking circles, complete with dedicated online communities, hands-on workshops, and even competitive events celebrating this unique art form. The core concept behind how to make 3D jelly art is actually pretty simple: you build a clear jelly canvas, then use a syringe to inject colored jelly mixtures at precise depths to form petals, leaves, and other shapes. Sounds easy enough — until you realize those depths are measured in millimeters and your hands need to be steadier than a surgeon's. That's the fun challenge of how to make 3D jelly art.
Why This Viral Dessert Trend Keeps Winning Hearts and Kitchen Time in 2026
Interest in 3D jelly art has surged for a few big reasons. First, short-form video platforms have made it ridiculously easy for creators to showcase the hypnotic process of injecting color into clear jelly. Those satisfying clips rack up millions of views, and honestly, they're impossible to scroll past. Second, home cooks are increasingly hunting for impressive yet accessible desserts that don't require an oven — no baking anxiety, no temperature drama, just chill and inject. And third, the rise of plant-based and vegetarian-friendly dessert options has made jelly art more appealing than ever, since most recipes are naturally dairy-free and can easily be made vegan with agar-agar instead of gelatin.
Industry professionals note the trend shows no signs of slowing down. As one seasoned dessert instructor put it, "3D jelly art combines precision, creativity, and visual drama — it's the perfect dessert for a generation that loves to share what they make." And honestly, when you understand how to make 3D jelly art, you've basically unlocked a party trick that doubles as edible art.
The Core Ingredients and Kitchen Essentials You'll Need for 3D Jelly Art
Before we get into the technique, let's talk about what actually goes into 3D jelly art. The ingredient list is surprisingly short, but quality matters — and knowing how to make 3D jelly art starts with understanding your jelly base.
1. The Clear Jelly Base Made from Agar-Agar Powder and Gelatin Sheets
Your base is typically made from agar-agar powder, gelatin, or a combination of both. Agar-agar is popular because it sets firmly and stays clear at room temperature, making it ideal for intricate work. Gelatin offers a slightly softer, more melt-in-the-mouth texture. Many creators in 2026 prefer a blend of the two to get the best of both worlds — firm structure with a pleasant bite. You'll also need water, sugar (to taste), and sometimes a little coconut milk or cream for the "milky" layers that create depth and contrast in the design. If you're serious about how to make 3D jelly art that looks professional, don't skip the milky layers — they're the secret sauce (well, secret coconut milk).Unarthodox Franchise
2. Coloring Agents Like Food-Grade Gels and Natural Colorants for Jelly Art
Food-grade coloring gels or natural colorants — like butterfly pea flower, beetroot powder, or matcha — are essential for color vibrancy. Gels work best because they're concentrated and won't water down your jelly mixture. A little goes a long way — you want vivid colors without compromising the jelly's set. This is a key lesson in how to make 3D jelly art: too much liquid coloring and your design turns into a cloudy mess.
3. Flavoring Extracts and Edible Essences That Complement the Visual Design
Jelly art should taste as good as it looks. Common flavorings include fruit extracts, vanilla, coconut, and floral essences like rose or jasmine. Keep flavors light so they complement rather than overpower the visual experience. After all, part of how to make 3D jelly art memorable is nailing that delicate taste balance.
4. Essential Tools Including Syringes, Jelly Art Needles, and Clear Molds
You don't need a professional kitchen to get started, but a few specialized tools make learning how to make 3D jelly art way easier. Here's what you'll want:
- Syringes and needles: Your primary tool. Small syringes with long, thin jelly art needles let you inject color precisely into the jelly base. Grab a few different needle sizes for different details.
- A clear mold or glass container: Round or dome-shaped molds work best for the illusion of depth. Glass containers are great because you can see exactly where you're injecting.
- A syringe holder or stand: Keeps your syringe stable between injections and prevents accidental drips.
- Small mixing bowls and whisks: For preparing your colored jelly mixtures.
- A thermometer: Temperature control is critical. Jelly mixtures need to be warm enough to inject but cool enough not to melt the base layer.
- Paper towels and a steady hand: Self-explanatory but essential.
Many newcomers ask whether they need a special "jelly art kit." In 2026, complete starter kits are widely available online, packed with syringes, needles, molds, and instructions. But you can absolutely assemble your own toolkit from general kitchen supplies — and honestly, figuring out how to make 3D jelly art with everyday tools is half the fun.Unarthodox Franchise
Step-by-Step Guide on How to Make 3D Jelly Art with a Simple Flower Design
Now for the fun part. Here's a practical, beginner-friendly process for how to make 3D jelly art — using a simple flower design as our example, since it's one of the most popular and forgiving patterns to start with.
Step 1: Prepare Your Clear Base Layer with Agar-Agar and Hot Water
Start by making a batch of clear jelly. Dissolve your agar-agar or gelatin in hot water according to the package instructions, add a little sugar, and stir until fully dissolved. Pour a thin layer — about 1 to 2 centimeters — into your mold and let it set. This first layer acts as the "floor" of your design and gives you a stable surface to build on. Pro tip: let it set completely at room temperature or in the refrigerator. A firm base prevents your design from sinking — a mistake every beginner makes when first learning how to make 3D jelly art.
Step 2: Prepare Colored Jelly Mixtures with Food-Grade Gels and Warm Temperatures
While the base sets, prepare small batches of colored jelly. Divide your warm jelly mixture into several bowls and add your coloring gels. You'll typically want at least three or four colors for a flower design — a darker shade for the petals, a lighter shade for highlights, and a contrasting color for the center. Keep these mixtures warm but not hot. If they cool too much, they'll start to set and clog your syringe. A thermometer helps here — aim for a temperature that's comfortable to touch but still liquid. This temperature control step is where most people mess up how to make 3D jelly art for the first time.
Step 3: Start Injecting Your Design at Different Depths for a Floating Effect
This is where the magic happens. Load your syringe with your first color and insert the needle into the clear base layer at a slight angle. Gently depress the plunger as you withdraw the needle, creating a petal-like shape. Work from the outer edges of your design inward. The key technique is called "layering depth." By injecting at different depths, you create the illusion that your design is three-dimensional. Petals injected deeper appear further away, while those closer to the surface seem to pop forward. This depth perception is exactly what separates a flat design from a truly stunning 3D jelly artwork — and it's the heart of how to make 3D jelly art look genuinely magical. Take your time. Rushing leads to blobs, uneven petals, and a muddy-looking design.
Step 4: Build Multiple Layers of Petals and Leaves for Realistic Depth
Once your first set of petals is in place, pour a thin layer of clear jelly over the design and let it set slightly. Then add your next set of petals at a shallower depth. Repeat until your design is complete. This layering technique gives 3D jelly art its signature "floating" appearance. For a flower, you might build three or four layers of petals, finishing with a small contrasting center. For more complex designs like fish or butterflies, you'll need more layers and more precise needle work — but the fundamental principle of how to make 3D jelly art stays the same.
Step 5: Set, Chill, and Unmold Your Finished 3D Jelly Art Piece
Once your design is finished, pour a final clear layer over the top to seal everything in. Let the entire mold set in the refrigerator for several hours — overnight is ideal. When you're ready to serve, dip the mold briefly in warm water to loosen the edges, then invert onto a plate. The moment of unmolding is always a thrill — that's when you finally see your 3D jelly art in all its glory, and you'll know all those hours of learning how to make 3D jelly art were totally worth it.
Common Mistakes to Avoid When Learning How to Make 3D Jelly Art
Even experienced creators run into problems, especially with new designs. Here are the most common pitfalls and how to dodge them.
- Syringe clogging: Usually happens when your jelly mixture is too cool or your needle is too narrow. Keep mixtures warm and match needle sizes to your detail level.
- Blurry or muddy designs: Results from injecting too much color at once or not letting layers set properly between injections. Work slowly and build up gradually.
- Air bubbles: Bubbles ruin the clarity of your jelly art. Tap your mold gently on the counter and avoid stirring vigorously.
- Design sinking: If your base layer isn't firm enough, your injected design will sink and distort. Make sure each layer is properly set first.
- Cloudy jelly: Use filtered water and make sure your agar or gelatin is fully dissolved. Impurities cause cloudiness that kills the visual impact.
As a general rule, patience is your most important tool. The creators who produce the most stunning 3D jelly art are the ones who take their time — and honestly, that's the real secret to how to make 3D jelly art that wows everyone.Unarthodox Franchise
Beginner-Friendly Design Ideas and Social Media Tips for 3D Jelly Art
Once you've mastered a simple flower, the creative possibilities are nearly endless. Here are some popular 3D jelly art designs to try as you build your skills — and a few ways to make your work stand out online.
Beginner to Advanced Designs Including Flowers, Koi Fish, and Landscape Scenes
- Beginner: Single flowers (lotus, cherry blossom, daisy), simple hearts, gradient "sunrise" designs using layered colors.
- Intermediate: Butterflies with layered wings, koi fish swimming in a clear pond, seashells and underwater scenes.
- Advanced: Complex floral bouquets with multiple depth levels, landscape scenes with mountains and sky, and animated-style characters (super popular in 2026 for themed parties).
One helpful habit: sketch your design on paper before you start injecting. It helps you plan colors, layers, and injection angles — and saves you from mid-project improvising that leads to messy results.
Photography, Lighting, and Presentation Tips to Showcase Your Jelly Art
A clear jelly base is classic, but adding a subtle milky layer behind your design makes colors pop — a thin coconut-milk layer behind flowers creates a gorgeous "glow" effect. Play with translucency: some petals nearly transparent, others rich and saturated. Add edible accents like gold leaf, tiny mint leaves, or a drizzle of fruit coulis — just don't overwhelm the delicate design inside. And if you're sharing online, natural light from a window is your best friend. Shoot from slightly above and to the side to capture the depth of your design. A clean, neutral background helps your colors shine.
3D jelly art is best served chilled and fresh. It keeps in the refrigerator for up to three days, though visual quality peaks within the first 24 hours. Keep it covered to prevent drying or absorbing odors. When serving, use a sharp knife dipped in warm water for clean slices — and present it whole first. Half the fun is the reaction you'll get when guests see the design inside. Whether you're aiming to impress at a dinner party or just explore a new creative hobby, now you know exactly how to make 3D jelly art — so grab your syringe, pick your colors, and give it a try.